Recently I posted how I make my shampoo bars. Today I want to share with you how I make my hair conditioner. I use three simple ingredients: Bragg’s apple cider vinegar with mother, water and lavender essential oil. I use half water and half vinegar. I add 20 to 25 drops of lavender oil in a 25 ounce bottle of conditioner. You can add as much as you like. It’s really great for your hair and smells wonderful.
Feel free to watch the video where I make my conditioner and I answer questions you may have about this conditioner.
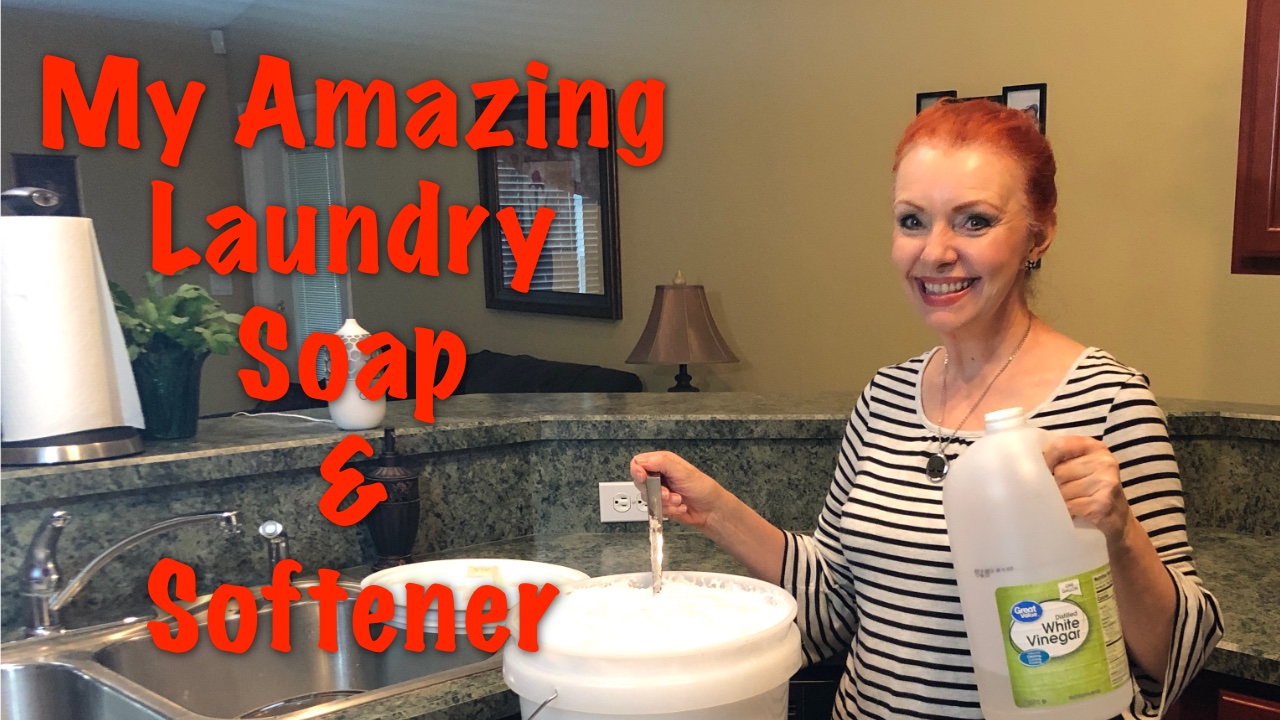
I absolutely love my laundry soap. It’s so cost effective and my clothes come out fresh and clean. I use three different stain fighting bar soaps (you can just use one if you wish) to help keep stains from setting into my clothes.
Just a little hint. If you have a lipstick stain or grease stain, I use Seventh Generation Dish soap on the actual stain. Gently rub it in with a little water and let it sit for a few minutes rinse and wash. If it’s super stubborn you may need to repeat the process. On some stains I just rub in some of my laundry soap.
Watch my video below to see how I make my laundry soap.
My Laundry Detergent Recipe
2 quarts of water in pan on stove
½ bar of Naptha soap grated*
½ bar of white Zote soap*
1 bar of Kirks Coco Castille soap*
2 cups of Borax*
1 cup of Arm & Hammer washing soda*
1 cup of Baking Soda
Directions:
Add finely grated soap to the water on stove (low/medium heat). Stir until soap is melted. I’ve found that it’s easier to melt one soap at a time. Add cool tap water to your buck (about 2 quarts). Pour soapy water mixture into a 5 gallon bucket (purchased at Home Depot or Lowes) add borax, washing soda, and baking soda. Stir well until all is dissolved. Add water until bucket is nearly full. Stir until well mixed. Let it sit over night. The next day I break it up with my hand and stir well. Then it is ready to use. I use 1/3rd cup full in my washer. I place it inside the washing machine instead of pouring into the dispenser.
I’ve been using this in my HE washing machine for four years.
* These items were purchased at Walmart on the Laundry Detergent isle.
Fabric Softener:
White Distilled Vinegar (Your clothes will not smell like vinegar) I put this in the fabric softener dispenser.
You can add vinegar in your load of towels to help kill bacteria by pouring it into the liquid soap dispenser of your washing machine.
If you have time, allow your hot soap mixture to cool down for a couple of hours before pouring into your bucket. If not, put a couple of quarts of cool water into the bucket first.
SUPPORT:
Want to support me in creating more recipes? Purchase your items by clicking on the links below and I’ll receive a small percentage of the final sale. Thank you!
——-DISCLAIMER——-
This video and/or description contain affiliate links. These links have the potential to earn me a small commission which is what helps to keep the channel running and helps me have the opportunity to continue making videos such as this one. Thank you so much for your support.
It’s so much fun spending time with my grands in the kitchen. I love that they enjoy cooking and baking. I think they will make great cooks when they grow up. Below is a video of the girls making their own recipe they call “Cha-Noodles”. This is spaghetti noodles, cheddar cheese, a little milk, and several spices. Not really a healthy recipe, but just the fact that they are learning to create in the kitchen is pretty awesome. They are naturals on video too.
Actually, anytime with my grands is pretty amazing! Feel free to watch the video and enjoy these sweet girls spending time with their Nana in their kitchen in Ohio.
I made an amazing cake in my instant pot. The best part of it was that it was a box mix that I altered and made it taste homemade. I don’t know who originated this recipe because there are several people that have posted it on Pinterest.
I used my new 2 tier stackable steam pans and the cake came out perfect. If you want to watch me make the cake you can click on the video. I made the chocolate peppermint icing from scratch. The icing tastes a bit like a York Peppermint Patty. The recipes are below the video. Make sure your cake is totally cooled before icing. (Obviously, I didn’t do that.)
What have you been cooking in your instant pot? Please leave comments down below.
Recipes:
Boxed Cake Mix that Tastes Like It’s Made from Scratch http://www.facebook.com/lisasmi1960 (this is where I got the recipe for the cake)
1 Cake mix
5 eggs
2 sticks of melted butter
1 cup of milk
Mix the above ingredients in your mixer and place the batter in your pre-greased and floured 2 tier steam pans. Now place your steam pans inside your instant pot for 30 minutes and allow a natural release (approximately 30 to 33 minutes). Make sure you have 1 to 2 cups of water inside the liner pan of your instant pot. (I put 2 cups of water in and turn my instant pot on manual at 30 minutes and allow the pot to start getting hot while I am preparing the cake batter. It doesn’t take as long to come to pressure this way.)
Chocolate Peppermint Icing:
4 cups powdered sugar
½ cup of Hershey’s Dark Chocolate/Hersheys Cocoa (I use ½ of each to make up ½ cup)
2 sticks of butter at room temperature
½ tsp vanilla
a few drops (6 or 7) of Peppermint Oil (Make sure is pure enough to ingest)
6 tbsp of boiling water
Mix altogether. Allow it to cool for 15 minutes. Make sure the cake is nice and cool before placing icing on the cake.
For a large cake you can double the recipe.
My Chocolate Icing Idea is from Cookies and Cups.com (I tweaked it a little)
SUPPORT:
Want to support me in creating more recipes? Purchase your items by clicking on the links below and I’ll receive a small percentage of the final sale. Thank you!
——-DISCLAIMER——-
This video and/or description contain affiliate links. These links have the potential to earn me a small commission which is what helps to keep the channel running and helps me have the opportunity to continue making videos such as this one. Thank you so much for your support.
Recently, I spent the afternoon with my friend Margarita. It’s always fun to have a girl’s day. She asked if I would come over and teach her how to use her new instant pot. I was happy to oblige. I asked what she wanted to cook and she decided on barbecue ribs and rice. You can go to “How to Make BBQ Ribs” on my blog to see that video and get the recipe.
I asked Margarita if she would teach me how to make her Puerto Rican Rice. She was happy to do so. You can watch the video below to see step by step instructions with my friend.
Margarita’s Puerto Rican Rice
1 tbsp of Olive Oil
2 tbsp of Sofrito*
1 to 1.5 tbsp of Adobo
1 tsp of Garlic powder
½ tsp of Onion Powder
½ tsp of Old Bay (Garlic & Herb)
1 pack of Sazon Goya
1 pack of ham flavored concentrate by Goya (optional)
1 8oz can of tomato sauce
4 cups of white rice
1 can of Gandules (Green Pigeon Peas)
3 cups of water
Put 1 tbsp of olive oil in pan on low. Add 2 tbsp of sofrito. Stir.
Add Adobo, garlic powder, onion powder, old bay, 1 pack of Sazon, 1 pack of ham flavored concentrate.
Add tomato sauce
Add 4 cups of rinsed rice
Add 1 can of rinsed gandules (pigeon peas)
Stir all the ingredients together.
Turn the burner to medium heat
Allow the rice to cook a little while until most of the liquid has dissolved.
Turn burner to low heat
Cover the pot with tin foil. Margarita likes to put a plate on top to really seal it.
Cook for 20 minutes.
Turn the rice towards the middle
Recover and cook for 20 minutes
Enjoy!
*Sofrito is made up of onion, garlic, bell pepper, and cilantro – you can purchase it in the freezer section in the store or make your own.
The rice was delicious. You can add green olives to it if you like. Feel free to leave me comments below. Happy cooking!
I absolutely love my homemade shampoo bars. I’ve been making them for about two years now. The difference these bars have made for my hair is amazing! If you decide to try them it will probably take about three to four weeks for your hair to adjust to using the shampoo bar. By the way, my hair stylist said she noticed a big difference in my hair after using the shampoo bar and homemade conditioner.
Lately I’ve been seeing articles about different shampoo brands that link to alzheimers. I don’t know if this is really true or not, but I am thankful that I have a way to wash my hair without the worries of it affecting my brain.
I make my own conditioner rinse too. It’s made up of organic apple cider vinegar with mother, water, and lavender essential oil. It’s very important to use this rinse after using the shampoo bar. It’s great for clarifying and conditioning hair. The recipe for my conditioner is simply 1/2 water to 1/2 organic apple cider vinegar with mother. Then I add about 12 to 15 drops of lavender oil. The lavender oil is optional. It helps to cover up the smell of the vinegar. The smell of vinegar will dissipate after a short while. For best results, shake up your conditioner and put it on your hair and let it sit for about a minute and then rinse with cool water. (Make sure it doesn’t run into your eyes.)
You can watch my YouTube video on how to make shampoo bars here:
Shampoo Bar for Dry Hair
(Not sure who created this recipe)
This recipe will make approximately 10 to 12 bars of soap depending on the size of your molds.
20 oz. coconut oil
13 oz. extra virgin olive oil
12.54 oz. distilled water
5.32 oz. lye
*Make sure that you pour the lye into the distilled water. You should never add liquid to the lye.
*Wear goggles, gloves, and long sleeves any time you are handling lye or soap before it tests non-caustic. Sometimes I wear a face mask. Lye can be very dangerous for your skin and could blind you if you get it in your eyes.
Step 1:
Weigh oils
Place them in crock pot on Low setting.
Melt the oils and then turn the crock pot off.
Step 2:
Weigh the lye (Make sure you are wearing your goggles and gloves. (Have vinegar near by in case you spill lye on your skin.) I put plastic lined paper on my counter top to protect it from lye.
Measure distilled water.
*Remember to make sure you add the lye to your liquid.
Take the measured water and slowly pour the lye into the liquid while stirring. Use a slotted spoon to stir. It will be cloudy at first but then it will turn clear again. Do this outside or in a well ventilated room.
Step 3:
Slowly pour the lye mixture into the crockpot where the oils have melted.
Stir briefly with a spoon and then mix will a stick blender. (Make sure you turn the stick blender off and on frequently so that you don’t burn out your blender.)
It will take about 10 to 11 minutes to bring it to trace. (Trace is when you can see a line left in the mixture when you move the blender or spoon across the top of the mixture.) Your trace will look like pudding when it’s ready.
Step 4:
Turn your crock pot on low and place the lid on the pot. The soap will gradually start to look waxy. The edges will look dryer. Stir frequently. It will look like waxy mashed potatoes when done.
You can test it by putting a tiny bit on a paper plate. Now take a tad of that and put it on your tongue. If it tastes soapy, it’s done. If it zaps your tongue, then it’s not done yet. (Zap will be like when you test a battery with your tongue. Rinse your mouth with water.)
It takes about 50 to 60 minutes to cook this recipe in the crockpot.
Step 5:
Scoop mixture into soap molds. Let it sit in the mold for about 1 hour. I allow my soap to cure at least 2 to 3 weeks. It can be used sooner, but it’s best to allow it to cure a while.
——-DISCLAIMER——-
This video and/or description contain affiliate links. These links have the potential to earn me a commission which is what helps to keep the channel running and helps me have the opportunity to continue making videos such as this one. Thank you so much for your support.
I absolutely love my instant pot. I am finding new ways of using it all the time. Recently I cooked chicken fajitas in my instant pot. They were so delish! Watch my video for step by step instructions. If you have an instant pot, please comment down below what your favorite things to cook in it are.
Chicken Fajita Recipe
3 chicken breasts cut into bite size pieces
1 1/2 bell peppers and 1 onion cut up
I like to use 2 to 3 different colors of peppers. (You can also buy frozen peppers & onions that are ready to use.)
1 pack of Frontera Taco Sauce
1/4 cup of water
Turn your instant pot on saute and immediately pour in the Frontera taco sauce. Add peppers & onions. Saute for 4 to 6 minutes depending on if peppers & onions are frozen or not.
Take the cooked peppers & onions and place in a bowl with lid.
Add chicken to the instant pot and add 1/4 cup of water.
Turn instant pot off and then turn on manual and set for 5 minutes. Place lid on and make sure your venting knob is on sealing.
It will take a few minutes for the instant pot to build pressure. Once it does then your timer will come on and start counting down.
After 5 minutes allow chicken to sit for 1 minute and then turn the knob to venting and allow all the steam to escape.
Mix chicken, peppers, and onions together.
Serve on tortillas or a large romaine lettuce leaf.
There’s nothing like yummy bbq ribs. Watch my video to see step by step instructions on how I cooked ribs in the instant pot. The ribs were so tender and delicious.
Directions for Ribs:
1 cup of barbecue sauce
1/2 to 1 cup of water
Mix the sauce and water
Put seasoning on ribs (optional) onion powder, garlic powder, adobo seasoning, fresh garlic.
Place ribs in the instant pot meaty or fat side down
Turn pot on manual for 40 minutes
Allow the pot to heat (approximately 10 minutes)
Cook for 40 minutes
Allow pot to release for 10 minutes and then turn the release knob to venting to release the rest of steam.
Remove lid and place ribs in serving dish.
Enjoy!
The holidays are right around the corner and you may be thinking, “Oh wow, the holidays always kick my butt when it comes to my eating plan.” But my friend, it doesn’t have to. I want to encourage you to choose wisely what you eat and if you want to have a piece of cake or a special dessert, take a small amount. It’s okay to treat yourself once in a while.
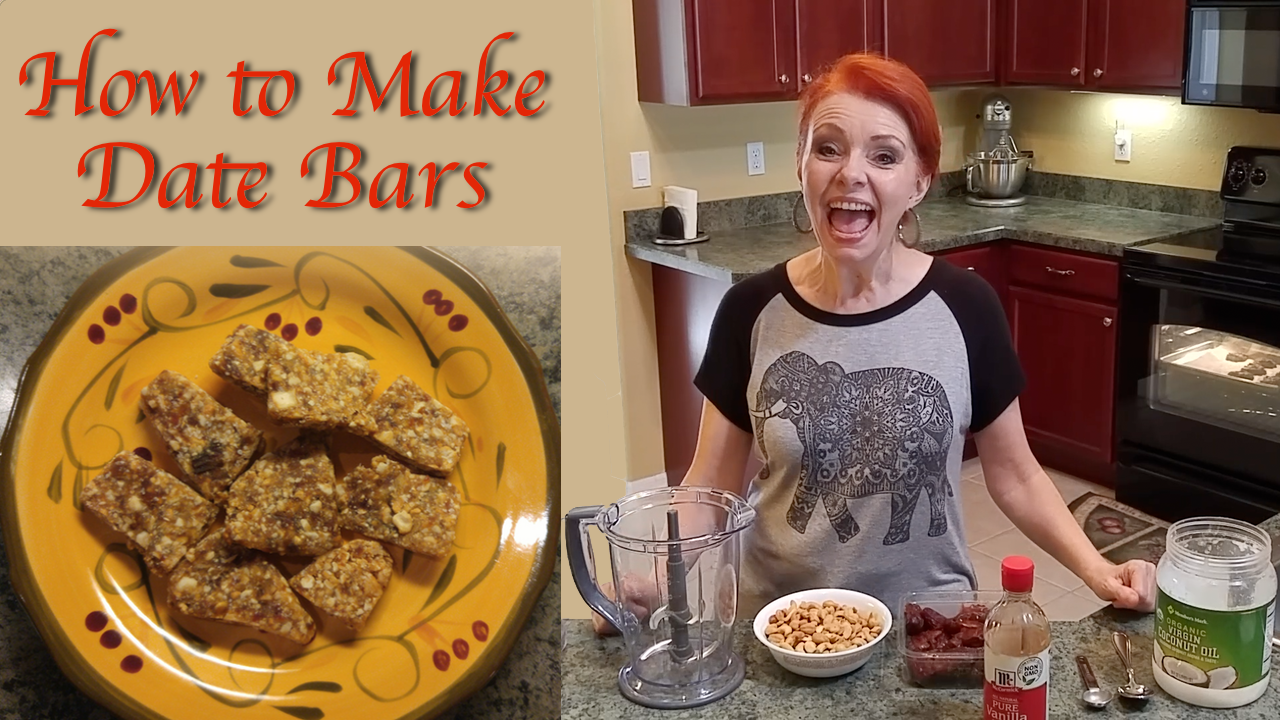
I don’t know about you but I definitely have a sweet tooth. So I have a few tried and true recipes that help me stay on plan and still satisfy my desire for sweets. One of those recipes is my date bars. These are so delicious and good for you. They satisfy that desire for sweet and salty. They are high in calorie so you don’t want to pig out on them. The good news is they are very satisfying so it only takes one or two small pieces to fill that craving.
Please watch my YouTube video posted down below for step by step instructions.
Date Bars (Unsure of who created the original recipe)
20 to 22 Medjool dates, depitted
2 cups unsalted/unroasted cashews
2 tbsp virgin coconut oil
1 tsp pure vanilla or almond extract
Topping:
Dash of Kosher salt
Optional:
Unsweetened chocolate
Directions:
Soak the depitted dates in warm water for a few minutes to soften.
Remove pits from dates.
Chop nuts in Ninja.
Combine the dates and chopped up nuts with coconut oil and vanilla or almond extract.
Mix all ingredients in the Ninja until they can be molded but not to sticky.
Use your hands and spread mixture onto a baking sheet covered with parchment paper.
Lightly sprinkle kosher salt on top.
Stick date bars in the freezer for about an hour, take out and cut into squares with a knife.
Store in freezer.
This recipe can be easily cut in half.
If you try this recipe I’d love to hear what you think of it. Please leave me comments down below. Thanks!
I love my homemade banana oatmeal cookies. They are naturally sweet and there is no flour in the recipe. If you love sweets but need to be careful on how much processed sugar you eat, this is a good recipe for you.
Banana & Oatmeal Cookies
Take 7 small over ripe bananas (or five large over ripe bananas) and mash them up in a mixing bowl.
Add two cups of uncooked oatmeal.
Add nuts and/or raisins. Pecans are my favorite. You can add ½ to 1 cup of nuts or raisins.
½ tsp of extract. I typically use vanilla, but tried orange and it was good.
Mix ingredients together.
Place tablespoons of dough onto cookie sheet and bake for approximately 15 minutes at 350. Cool on a cooling rack for 10 to 15 minutes. Makes healthy, yummy cookies. Watch my YouTube video for step by step instructions.